Contributing
The Experimenter documentation hub is managed in the mozilla/experimenter-docs repository. You will need a GitHub account to contribute, and if you are not already in the Project Nimbus GitHub team, you may need to request write access in the #nimbus-project Slack channel.
Please file issues for this repository in Experimenter and add the experimenter-docs label.
This page will walk you through how to edit an existing document or create a new one, how to display docs in the sidebar where desired, and how to make these changes in GitHub. See the in-page header navigation bar on the right-hand side of this doc for handy quicklinks.
Documents are written in Markdown (.md) files using GitHub-flavored Markdown syntax and are compiled into static web pages. MDX is also supported, meaning you may embed React components in content as needed. Additionally, Docusaurus offers admonitions which can be useful when placing emphasis on pieces of documentation. Refer to Docusaurus Markdown features for more technical information about these Markdown pages.
If you need custom CSS styles, you can edit the src/css/custom.css file. Try to use classes when writing MDX with names that will be easy to reuse later.
Configuring Your Notifications
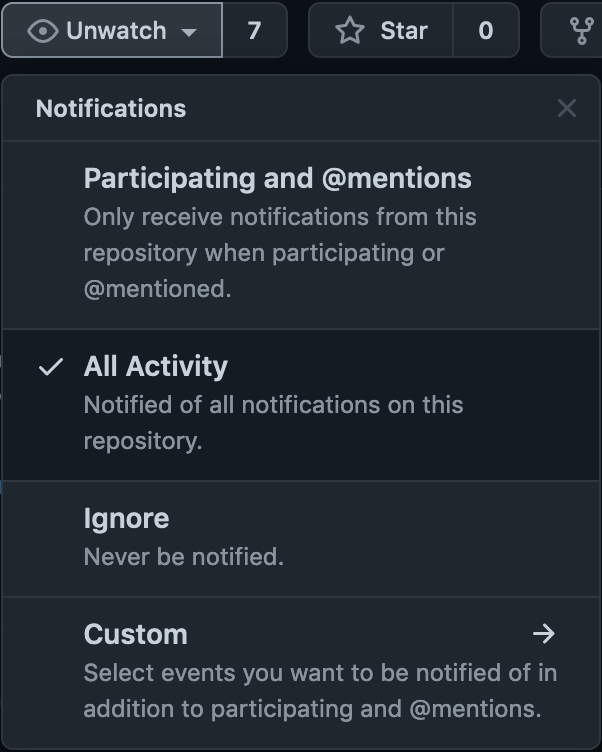
If you would like to subscribe to notifications for this repository, including for when someone requests doc changes with a pull request that you can potentially review and approve, be sure to "Watch" the repository by clicking on the repository's "Notification settings" menu and selecting "All Activity."
Also, see configuring notifications in GitHub.
Alternatively, consider subscribing to this repository in the GitHub Slack app by searching for it under "Apps" inside Slack.
GitHub Workflow
All documentation edits and additions will require a pull request into the main branch because merged changes will trigger an automatic deployment, but fear not if you don't prefer pulling down repositories locally and editing files - you probably don't need to.1
Editing in the GitHub UI
If you aren't familiar with using Git via the command line, we recommend using the GitHub user interface to make changes to docs. See the GitHub UI Docs if you need further details than what's provided here.
In the following sections, you'll find corresponding links to the GH UI directly under each section title. If you need to edit a file, you'll click on the "Edit" button:
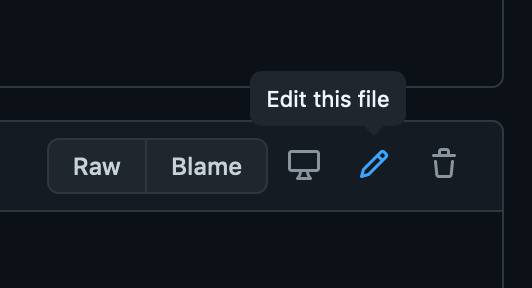
You'll be brought to the GitHub editor page for that file. If you're creating a new document, you'll see a similar editor.
When you're satisfied with your changes or new document, at the bottom of the page, enter a commit message and optional description. Be sure to have the option "Create a new branch" selected, the name of which can be anything, but if you also need to make edits to the sidebar or add images, you'll want to keep the branch name in mind.
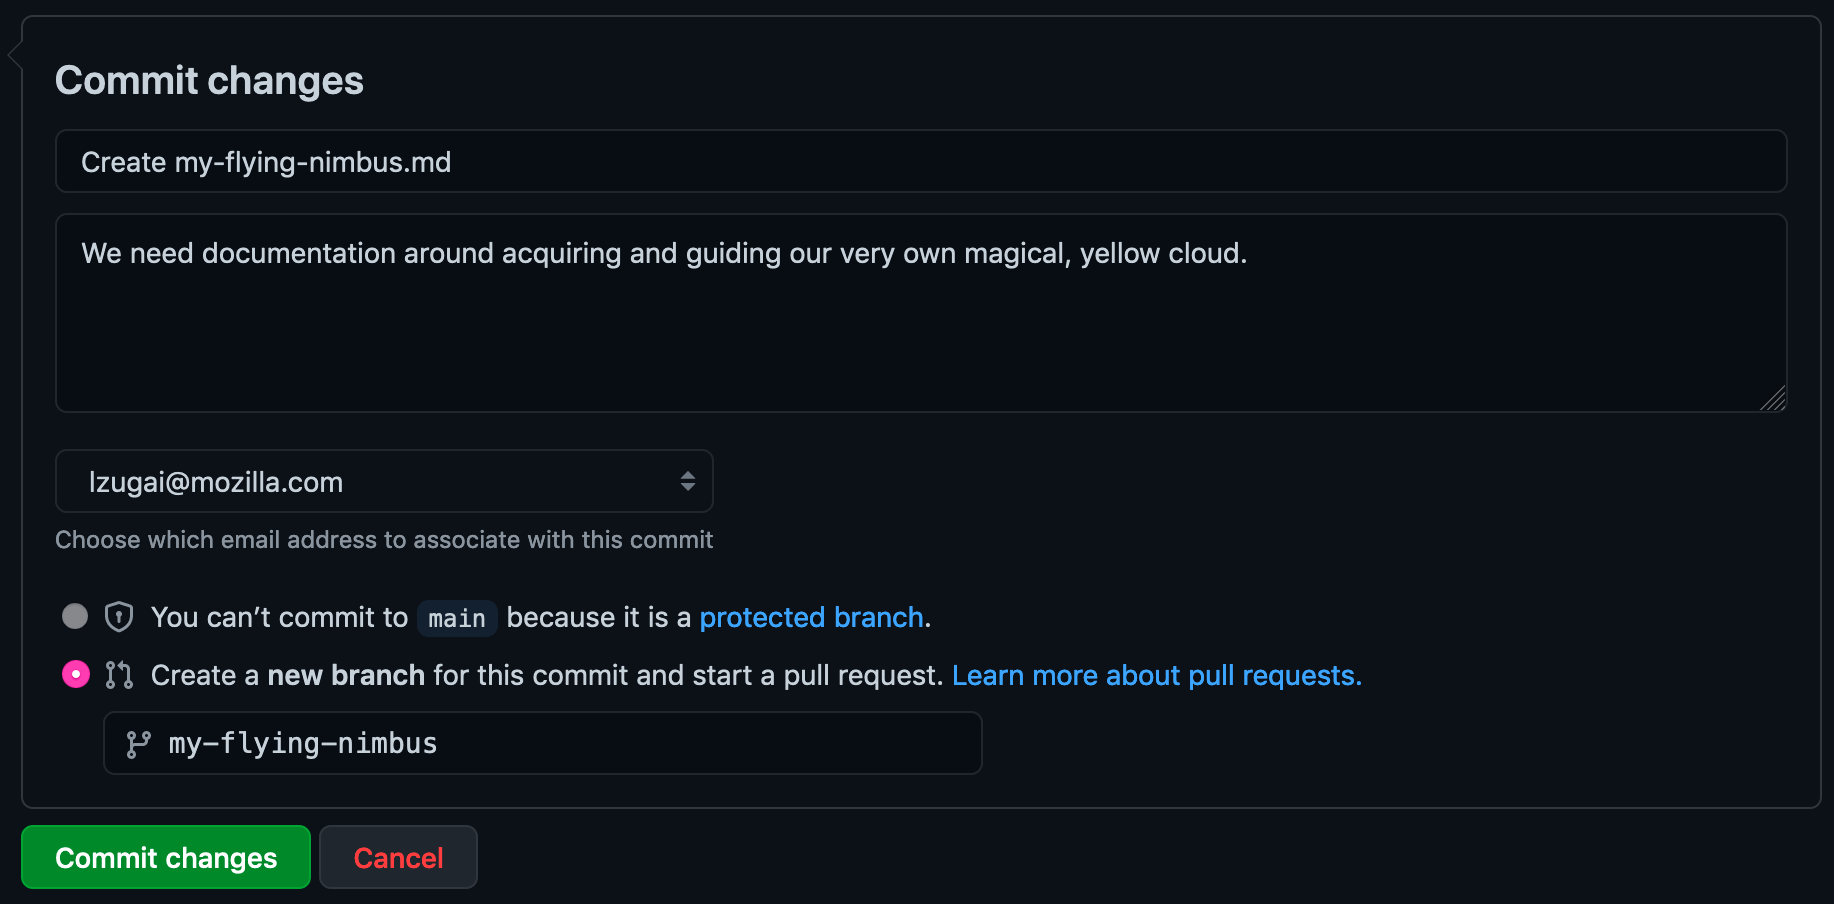
Click Commit changes and you'll be brought to a pull request view comparing your new branch to main. If you don't need to make updates to the sidebar, see the Pull Request Workflow section and click Create pull request.
Doc Edits + Sidebar Edits
If you also need to make updates to the sidebar, you will follow the GH UI link under "Adding or Modifying Sidebar Links" but replace "main" in the URL with the name of your branch. For example, if the name of your branch is my-flying-nimbus, this would be the link you'd use to edit that file. Similarly to the instructions above, after you've made the desire changes, enter a commit message and optional description. However, this time, you will select the option commit directly to the my-flying-nimbus branch instead of creating a new branch.
After committing your changes, you'll be brought back to a pull request view comparing your new branch to main. You may need to edit the PR title, but if your files changed look good, click Create pull request and see the Pull Request Workflow section.
Pull Request Workflow
PR Template
After clicking Create pull request, you will be presented with a pull request template specific to this repository.
Edit the line Closes: mozilla/experimenter#0000 where experimenter may need to be changed to reflect the repository where the GitHub issue lives and where 0000 should be changed to reflect the issue number. Delete this section if merging your pull request won't close an issue.
Under "Permission Checklist," check the boxes applicable to your pull request that would make this process easier for you. If you have any specific requests regarding the checkboxes or anything else, please note them in the pull request.
Reviewing and Merging
To make sure your pull request is reviewed, either request a specific reviewer to look at your PR, request the mozilla/project-nimbus-team, or ask the team in the #nimbus-project Slack channel to take a look. Once you've created the pull request, automatic checks will run to ensure the project can build and deploy successfully with your changes, and at least one reviewer will need to approve your PR.
Documentation is community property. Our norms for this repo are that it's fine for a reviewer to commit small adjustments directly to the branch including typo fixes, Markdown/MDX improvements, title or sidebar (ID) suggestions, etc. The reviewer may leave comments instead, at their option. Reviewers may also merge changes after approving them. These practices are different from our usual assumptions about code and are intended to reflect the lower risk of changing documentation. Reviewers should use their judgement and seek feedback from the original writer before making major changes.
You may receive feedback or questions on your PR that you can address through editing the file in question locally or in the GH UI. When your PR is approved, you should go back to merge your own pull request in case you may want to make another edit before the pull request is merged or because you may get a non-blocking suggestion. If that happens, you can make the change and then merge the PR or simply merge the PR if you disagree with the comment.
Once your PR is merged, you should see your changes reflected at the URL this hub is housed at in about 10 minutes.
Create a New Document
Let's say you want to create a new document called "My Flying Nimbus" that details how to acquire and guide your very own magical, yellow cloud.
In the docs/ directory, either locally on your machine or through the GitHub UI link above, create your file, my-flying-nimbus.md. The name can be whatever you want, but it's a good general rule of thumb to keep the name similar to whatever the doc title will be.
Paste the following doc metadata, or frontmatter as it's referred to in Docusaurus, at the top of the file:
---
id: my-flying-nimbus
title: My Flying Nimbus
slug: /my-flying-nimbus
---
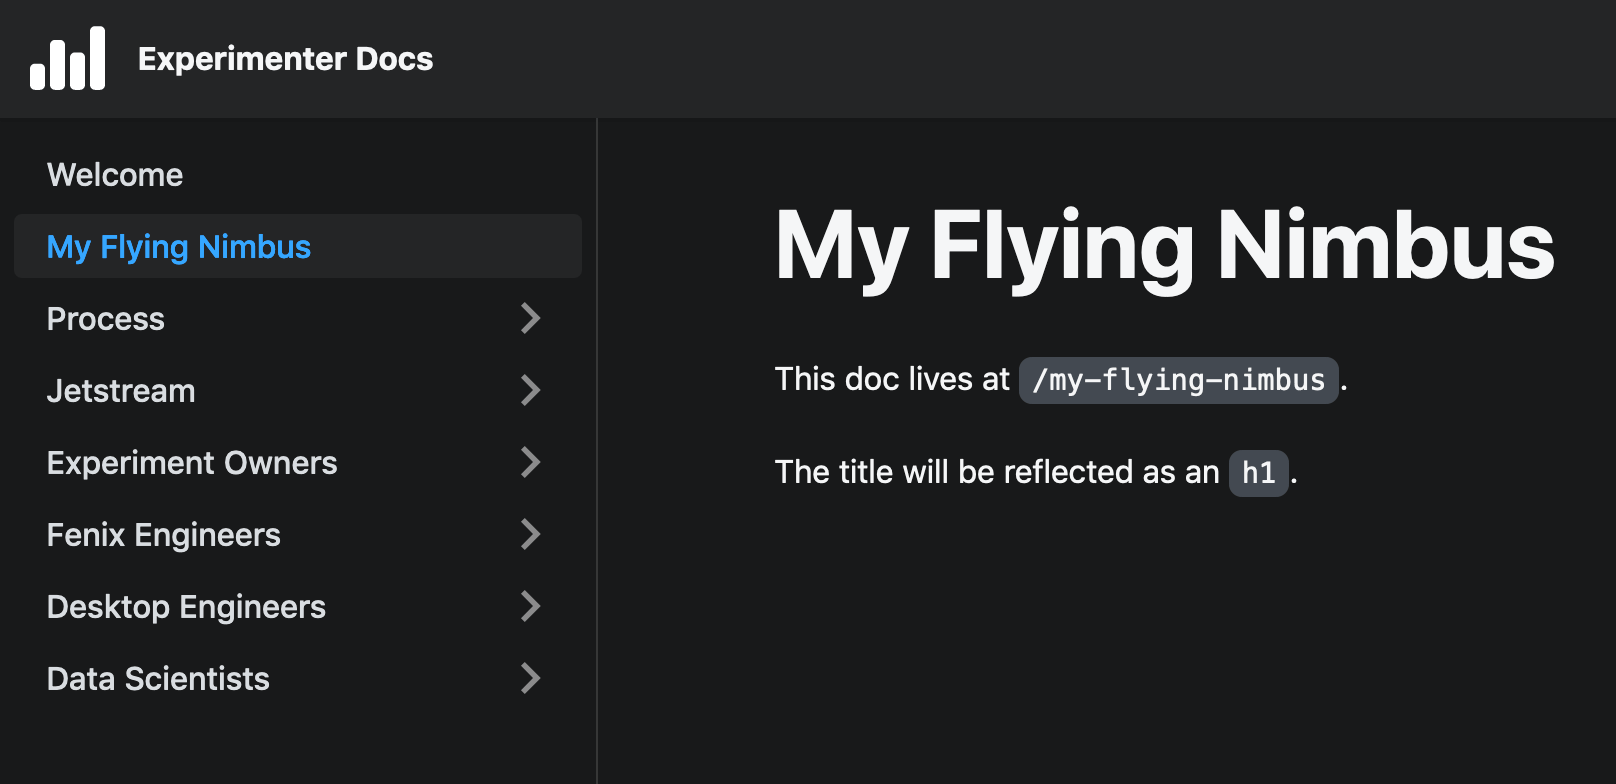
With this at the top of the MD file, Docusaurus will automatically make your document available for viewing at the slug /my-flying-nimbus. Write your document in MD/X and once you're satisfied with your new document, commit and push your changes to your branch or follow the instructions in the GitHub UI section to commit your changes and put in your pull request.
Modify an Existing Document
Editing an existing doc is easy peasy. Click on the link above and choose the document you want to modify, or alternatively, find the "Edit this page" link at the bottom of any document inside the Doc Hub, and follow the instructions in the GitHub UI section.
Modifying the title property at the top of the document will update what the sidebar link displays.
Note that if you change the ID also found at the top of the document, you will also need to update the matching string in sidebars.js (it's case-sensitive). See the "Adding or Modifying Sidebar Links" section for more details as well as Doc Edits + Sidebar Edits in the GH UI.
Adding Images
Images for your documentation should be located at static/img/your-doc-name/image-name.png. To upload these in the GH UI, change my-flying-nimbus in the link given above to the name of your documentation which will reflect a new directory that holds the images for your doc. When you've finished uploading your images, follow the instructions in Editing in the GH UI to commit this to a new branch or existing branch you've already committed documentation edits to. (Tip: if you've already made a doc change and use this link to commit image changes, make sure "main" in the URL is updated to your branch name!)
Once you know the name of your image, you can insert the following in your documentation...
<img
  src="/experimenter-docs/img/my-flying-nimbus/image-name.png"
  alt="changeme, alt text describing the image"
  className="img-lg"
/>
...where my-flying-nimbus is the name of the directory (and doc name) and image-name is the name of the image.
Unfortunately you won't be able to preview the image in the GitHub UI or custom styles you add to it. To do this, you will have to follow the repo front-page instructions to run the project locally. This is recommended if you need to right-align or left-align an image, but if you just need to display an image at full-width, you can optionally check the box in the pull request template asking for the reviewer to check into your branch and look at it for you.
You can add a className to the image, like img-lg, to adjust the size. Click here to see our custom CSS file and edit it in the GH UI here.
Add or Modify Sidebar Links
If you'd like to add a new external link, link to a new document, or modify an existing link in the sidebar, you have a few options.
Note that the id references in this section are case-sensitive. Also, if you'd like more details than what's provided here, you can check out the Docusaurus Docs on sidebars.
Tip: If you just need to update the sidebar label and not the page title (atypical), just add sidebar_label: Nimbuses Are Sweet to the frontmatter section at the top of the MD file.
- Create a new top-level internal link to the doc or modify an existing one
To set this up, you'll have to modify the sidebars.js file locally or through the GH UI link above - all it needs is the id that is set at the top of the MD file. It will look something like this to reflect the screenshot:
module.exports = {
  sidebar: [
    "welcome",
    "my-flying-nimbus", // this doc ID is all you need to add!
    ... // other unrelated sidebar items
- Create a new top-level external link to the doc
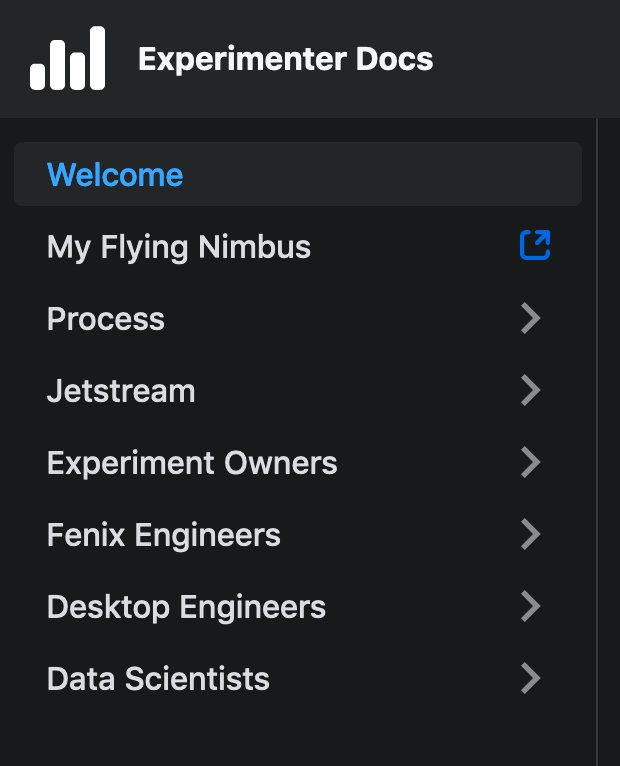
If you'd like to add a new top-level external link, sidebars.js requires an object expecting type, label, and href that will look something like this to reflect the screenshot:
module.exports = {
  sidebar: [
     "welcome",
   {
     type: "link",
     label: "My Flying Nimbus",
     href: "https://magicalyellowcloud.com",
   },
   ... // other unrelated sidebar items
You'll want to make sure type is set to "link".
- Create a new internal link to the doc in an existing or new category
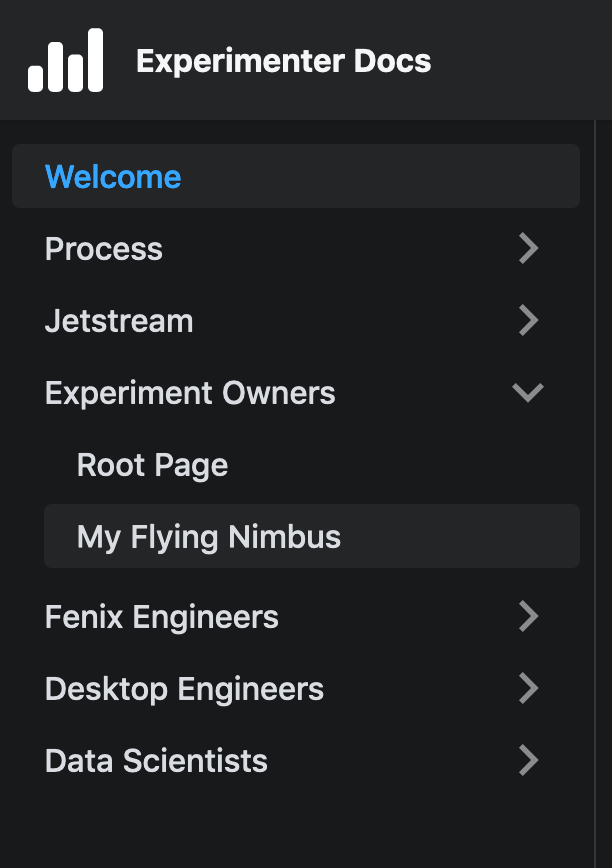
In Docusaurusland, sidebar menu items with a down caret are called "categories."
To add your internal page to an existing category, find the category via the label item in sidebars.js which will match the category text you see displayed in the sidebar (see code below). Find the items array for that category and add the doc ID you wish to link internally to.
To add your internal page to a new category, copy and paste the entire object shown below where you'd like it to show up in the sidebar. Edit your label as desired and change items to items: ["my-flying-nimbus"] with your doc ID.
module.exports = {
  sidebar: [
     ... // other unrelated sidebar items
    {
      type: "category",
      label: "Experiment Owners", // what you're looking for, or creating
      items: ["experiment-owners-root", "my-flying-nimbus"], // doc ID is in this array
    },
    ... // other unrelated sidebar items
- Create a new external link to a doc in an existing or new category
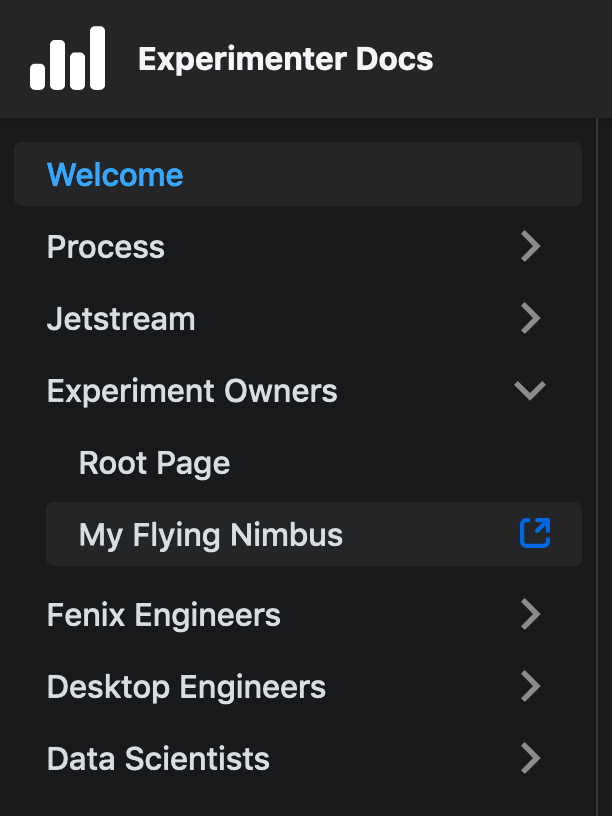
The code changes for this option essentially combine options 2 and 3.
To add your external link to an existing category, find the category via the label item in sidebars.js which will match the category text you see displayed in the sidebar (see code below). Find the items array for that category and add the object shown below (also shown in option 2) to the array.
To add your external link to a new category, copy and paste the entire object shown below where you'd like it to show up in the sidebar. Edit your top-level label as desired, remove "experiment-owners-root", from the items array, and update the label you'd like to display for the link.
module.exports = {
  sidebar: [
     ... // other unrelated sidebar items
    {
      type: "category",
      label: "Experiment Owners", // what you're looking for, or creating
      items: ["experiment-owners-root",
        {
          type: "link",
          label: "My Flying Nimbus",
          href:
            "https://magicalyellowcloud.com",,
        },
      }],
    },
    ... // other unrelated sidebar items
- If you'd like to preview your sidebar changes or if you need to preview how a document containing MDX will build, you'll likely want to check into your branch and run
yarn startto see the changes. Please reach out to the Experimenter team if you need help.↩